カテゴリー: 技術

Google Chromeの拡張機能を作ってみる!

投稿者:isc_blog

Google Chrome アドオン 作成 日記

※参考資料
Google Chrome Hello worldの作り方 アドオン機能を開発者向けに解禁

ここ↓閲覧しながら進めることにします。
http://code.google.com/chrome/extensions/index.html

開いたら・・・
引用 ——————-
How do I start?
1.Follow the Getting Started tutorial
2.Read the Overview
3.Keep up-to-date by reading the Chromium blog
4.Subscribe to the chromium-extensions group
————————
とあるので

まずは Getting Started tutorial
http://code.google.com/chrome/extensions/getstarted.html

「Create and load an extension」の章を見てやってみる(全編英語なのが辛いけどがむばる)
1.Create a folder somewhere on your computer to contain your extension’s code.
要するにどこでもいいからフォルダ作れってことね。
はい作成。

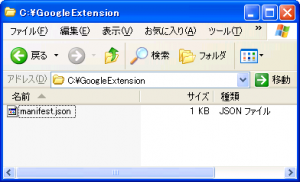
「GoogleExtension」フォルダをc:\に作りました。

2.Inside your extension’s folder, create a text file called manifest.json, and put this in it:


{
"name": "My First Extension",
"version": "1.0",
"description": "The first extension that I made.",
"browser_action": {
"default_icon": "icon.png"
},
"permissions": [
"http://api.flickr.com/"
]
}


作ったフォルダに「manifest.json」って名前で上記のコード記述しろって言ってるよね。

はい、完了!

3.Copy this icon to the same folder:
Download icon.png
同じフォルダにicon.pngをダウンロードしろって言ってるのでダウンロードします。

4.Load the extension.

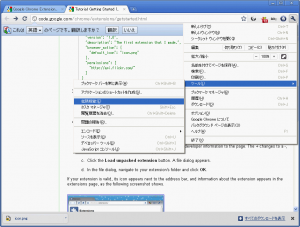
a.Bring up the extensions management page by clicking the wrench icon and choosing Tools > Extensions.
b.If Developer mode has a + by it, click the + to add developer information to the page. The + changes to a -, and more buttons and information appear.
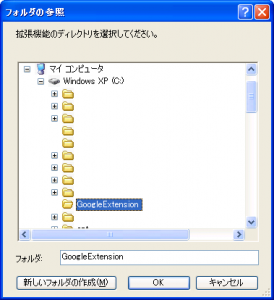
c.Click the Load unpacked extension button. A file dialog appears.
d.In the file dialog, navigate to your extension’s folder and click OK.

a.レンチのアイコンをクリックして Tools → Extensions 開く(日本語だとツール→拡張機能)
b.デベロッパーモードが「+」だったらクリックして・・・
c.「パッケージ化されていない拡張機能を読み込みます…」ボタンをクリック。
d.ファイル選択ダイアログでさっき作ったフォルダを指定して「OK」ボタンをクリックする。
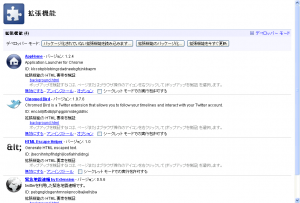
If your extension is valid, its icon appears next to the address bar, and information about the extension appears in the extensions page, as the following screenshot shows.

まぁ、問題なかったらアイコンがアドレスバーの横に表示されて、拡張機能の情報が拡張機能のページに表示されます。次のスクリーンショットのように。
(結構直訳すみません。)
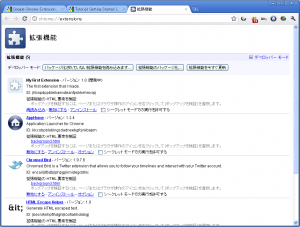
これは問題なかったんだろう・・・

それで次が本題だろう・・・
「Add code to the extension」に入ります。

In this step, you’ll make your extension do something besides just look good.
1.Edit manifest.json to add the following line:


"browser_action": {
"default_icon": "icon.png",
"popup": "popup.html"
},


「manifest.json」にこの行を追加する・・・
※現在「manifest.json」はこんなソース


{
"name": "My First Extension",
"version": "1.0",
"description": "The first extension that I made.",
"browser_action": {
"default_icon": "icon.png"
},
"permissions": [
"http://api.flickr.com/"
],
"browser_action": {
"default_icon": "icon.png",
"popup": "popup.html"
}
}


2.Inside your extension’s folder, create a text file called popup.html, and add the following code to it:

同じフォルダに「popup.html」っていう名前のファイルを作って
「CSS and JavaScript code for hello_world」をクリックして得たコードをコピペ

2.Return to the extensions management page, and click the Reload button to load the new version of the extension.
拡張機能のページに戻って、リロードボタンを押し機能拡張の「再読込する」ボタンを押す。

3.Click the extension’s icon. A popup should appear that displays the contents of popup.html.
その後、アドレスバー横の機能拡張アイコンを押すと「popup.html」のコンテンツが表示される・・・

It should look something like this:
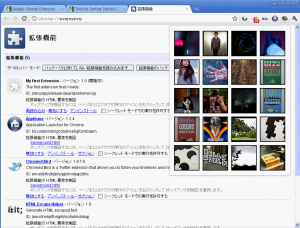
If you don’t see the popup, try the instructions again, following them exactly. Don’t try loading an HTML file that isn’t in the extension’s folder – it won’t work!
Google翻訳で翻訳:あなたはポップアップを表示されない場合は、正確にそれらに続いて、作業手順をもう一度試してください。それは動作しません-拡張機能のフォルダにないHTMLファイルをロードしないでください!

・・・というわけで「Now What?」は現在どうですか?的な感じなので省略します。
「The hosting page, which tells you about options for distributing your extension」
という項目の「hosting」のリンク先に配布方法らしきものが・・・
これは後日・・・

2011年5月18日

jQueryでlightboxみたいな「prettyPhoto」を使ってみる

投稿者:isc_blog

前にお客様サイト上に「お問い合わせフォーム」を掲載する際に
prototype.js で 「lightbox」を使ってビューっとウィンドウ出したことがあったなぁと思い今回「jQuery」で実装しなければならなかったため調べたところ
「prettyPhoto」というものがありました。

本家サイトをいろいろ見れば使い方がわかるんですが(なんだかすごいです。)
今回、「お問い合わせフォーム」として使用するため、下記のような規制がありました。
・下部に表示される「twitter」をはじめとするボタンが不要
・リンクではなくボタンで起動する

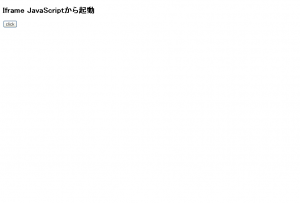
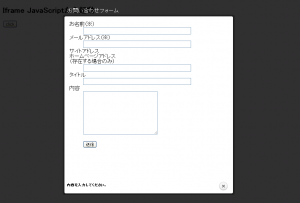
で、こんな感じで出来ました!
下記を「test.html」としました。
[html]
<!DOCTYPE html>
<html>
<head>
<title>jQuery lightbox clone – prettyPhoto – by Stephane Caron</title>
<meta http-equiv="Content-Type" content="text/html; charset=utf-8" />
<script src="http://www.google.com/jsapi"></script>
<script>
google.load("jquery", "1.6");
</script>
<link rel="stylesheet" href="css/prettyPhoto.css" type="text/css" media="screen" title="prettyPhoto main stylesheet" charset="utf-8" />
<script src="js/jquery.prettyPhoto.js" type="text/javascript" charset="utf-8"></script>
<script type="text/javaScript">
function openInquiry() {
$.prettyPhoto.open(‘inquiry.html?iframe=true&amp;width=500&amp;height=500′,’お問い合わせフォーム’,’内容を入力してください。’);

}
</script>
</head>
<body>
<div id="main">
<h2>Iframe JavaScriptから起動</h2>
<input type="button" value="click" onclick="openInquiry();" />

<script type="text/javascript" charset="utf-8">
$(document).ready(function(){
$("area[rel^=’prettyPhoto’]").prettyPhoto();
});
</script>
</div>
</body>
</html>
[/html]
で、中に表示されるhtml (その1:inquiry.html)
[html]
<!DOCTYPE html PUBLIC "-//W3C//DTD html 4.01 Transitional//EN">
<html>
<head>
<meta http-equiv="Content-Type" content="text/html; charset=Shift_JIS">
<TITLE>お問い合わせ</TITLE>
</head>
<body>
<form name="form" action="result.html" method="get">
<dt>お名前(※)</dt>
<dd><input name="お名前" size="50" maxlength="255" value="" type="text"></dd>
<dt>メールアドレス(※)</dt>
<dd><input name="メールアドレス" size="50" maxlength="255" value="" type="text"></dd>
<dt>サイトアドレス<br>ホームページアドレス<br>(存在する場合のみ)</dt>
<dd><input name="ホームページアドレス" size="50" maxlength="255" value="" type="text"></dd>
<dt>タイトル</dt>
<dd><input name="タイトル" size="50" maxlength="255" value="" type="text"></dd>
<dt>内容</dt>
<dd><textarea name="内容" rows="10" cols="30"></textarea></dd>
<dt>&amp;nbsp;</dt>
<dd><input value="送信" type="submit"></dd>
</form>
</body>
</html>
<hr />
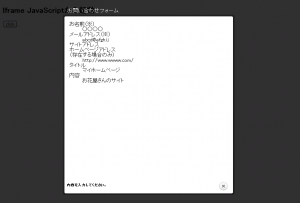
続いて、結果ページ result.html
<hr />
<!DOCTYPE html PUBLIC "-//W3C//DTD html 4.01 Transitional//EN">
<html>
<head>
<meta http-equiv="Content-Type" content="text/html; charset=Shift_JIS">
<TITLE>お問い合わせ</TITLE>
</head>
<body>
<form name="form" action="result.html" method="get">
<dt>お名前(※)</dt>
<dd>○○○○</dd>
<dt>メールアドレス(※)</dt>
<dd>abcd@efgh.ij</dd>
<dt>サイトアドレス<br>ホームページアドレス<br>(存在する場合のみ)</dt>
<dd>http://www.wwww.com/</dd>
<dt>タイトル</dt>
<dd>マイホームページ</dd>
<dt>内容</dt>
<dd>お花屋さんのサイト</dd>
</form>
</body>
</html>
[/html]
※本来はPHPとかでやるはずです。

構成は下記の通り
[html]
prettyPhoto
│ inquiry.html
│ result.html
│ test.html

├─css
│ prettyPhoto.css

├─images
│ │
│ ├─fullscreen
│ │ 1.jpg
│ │ 2.jpg
│ │ 3.jpg
│ │ 4.jpg
│ │ 5.jpg
│ │ 6.jpg
│ │ high.gif
│ │ huge.gif
│ │ wide.gif
│ │
│ ├─prettyPhoto
│ │ ├─dark_rounded
│ │ │ btnNext.png
│ │ │ btnPrevious.png
│ │ │ contentPattern.png
│ │ │ default_thumbnail.gif
│ │ │ loader.gif
│ │ │ sprite.png
│ │ │
│ │ ├─dark_square
│ │ │ btnNext.png
│ │ │ btnPrevious.png
│ │ │ contentPattern.png
│ │ │ default_thumbnail.gif
│ │ │ loader.gif
│ │ │ sprite.png
│ │ │
│ │ ├─default
│ │ │ default_thumb.png
│ │ │ loader.gif
│ │ │ sprite.png
│ │ │ sprite_next.png
│ │ │ sprite_prev.png
│ │ │ sprite_x.png
│ │ │ sprite_y.png
│ │ │
│ │ ├─facebook
│ │ │ btnNext.png
│ │ │ btnPrevious.png
│ │ │ contentPatternBottom.png
│ │ │ contentPatternLeft.png
│ │ │ contentPatternRight.png
│ │ │ contentPatternTop.png
│ │ │ default_thumbnail.gif
│ │ │ loader.gif
│ │ │ sprite.png
│ │ │
│ │ ├─light_rounded
│ │ │ btnNext.png
│ │ │ btnPrevious.png
│ │ │ default_thumbnail.gif
│ │ │ loader.gif
│ │ │ sprite.png
│ │ │
│ │ └─light_square
│ │ btnNext.png
│ │ btnPrevious.png
│ │ default_thumbnail.gif
│ │ loader.gif
│ │ sprite.png
│ │
│ └─thumbnails
│ flash-logo.png
│ quicktime-logo.gif
│ t_1.jpg
│ t_2.jpg
│ t_3.jpg
│ t_4.jpg
│ t_5.jpg

└─js
jquery-1.3.2.min.js
jquery-1.4.4.min.js
jquery.prettyPhoto.js
[/html]
サンプルはこちらに置きました↓
http://ivankov.iscw.jp/prettyPhoto/test.html


↓↓↓


↓↓↓


アーカイブダウンロードはこちら
ダウンロード

2011年5月16日

favicon.ico を作るサイト

投稿者:isc_blog

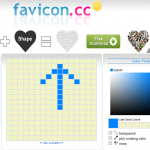
favicon.ico Generatorfavicon.ico Generator

ここで簡単に作れます!
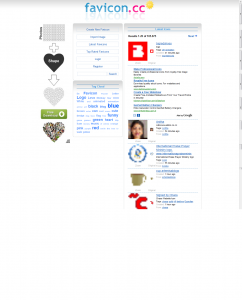
しかも他の方が作ったアイコンも閲覧可能。
すごいのを作る方がいますねぇ~


[Latest favicons]をクリックするとこれまでの履歴が見られます。

便利です。

ちなみに「favicon.ico」をページに設定するためには
<head></head> 内に
<LINK REL=”SHORTCUT ICON” HREF=”favicon.ico”>
href= には 「http://~」などの絶対パスか相対パスで記述します。


追記 2011/05/16


ちなみに弊社デザイナーは
favicon.icoを作ろう!というサイトを利用している とのこと
こちらは3つのアイコンをひとつのファイルにまとめられるので便利とのこと。

2011年5月14日

IE6でSSL通信の場合、xmlHttpRequestのonreadyStateChangeがうまく拾えない場合がある

投稿者:isc_blog

この現象は IE6(InternetExplorer6)でhttps://~ で発生します。
サイト上から下記Javascriptのような処理を行ったところ
非同期通信でデータを取得し取得が完了したら結果をサブウィンドウに表示する処理なのだが
一度目はデータを読み込みサブウィンドウを開いて表示したものの
2回目はサブウィンドウを開くそぶりもない・・・
JavaScriptにalert()を入れてみたところ
「きたよ!」が出ない・・・

どうやら通信に行っていないようだ
[javascript]
xmlHttpRequest.onreadyStateChange = function() {
// ↓ここにalert
alert(‘きたよ!’);
if (xmlHttpRequest.readyState == 4 && xmlHttpRequest.status == 200) {
subwin = ("","subwin","width=400,height=370");
subwin.document.open();
subwin.document.write(xmlHttpRequest.responseText);
subwin.document.close();
}
}
[/javascript]
なにが悪いのかな・・・・と調べたところ
どうやらIE6でSSL通信の場合キャッシュを見てしまって通信すら行かないらしい・・・

上記ソースの場合、通信しないとサブウィンドウが開かないので
シレっと何事もないようになってしまうから厄介だ・・・

この場合、手っ取り早いのは
リクエスト送信時にタイムでも付けてしまうこと・・・
[javascript]
var time = (new Date()).getTime();
xmlHttpRequest.open("GET", "/service/AAAA?" + time);
[/javascript]
IE7やFireFoxでは再現しないみたい(IE8以降は試してません)

キーワード
onreadyStateChange キャッシュ ssl サブウィンドウ

2011年5月13日

Twitter発言をjQueryとJSONPで取得して表示してみました

投稿者:isc_blog

先日紹介したWEBサービスで使用されている「jsonp」で取得と表示を簡単に出来ないかな?と思い「Twitter」のAPIを利用してデータを取得しJSONPで表示するものを書きました。

※JSONPについては→JSONPとは

[html]
<html>
<head>
<meta http-equiv="content-type" content="text/html; charset=utf-8" />
<title>JSONPでTwitter発言表示してみました</title>
<script type="text/javascript" src="http://www.google.com/jsapi"></script>
<script type="text/javascript">google.load("jquery", "1.6.0");</script>
<script type="text/javascript">
function dispTweet() {
// 一度クリアにする
$("#recent").html("");
// ユーザーアカウントのデフォルト値
var screenName = "isc_web";
// デフォルト表示件数
var count = 20;
if ($("#sname").val() != "") {
screenName = $("#sname").val();
}
if ($("#count").val() != "" && !isNaN($("#count").val())) {
count = $("#count").val();
}
var url="http://api.twitter.com/1/statuses/user_timeline.json?screen_name=" +
screenName + "&count=" + count + "&callback=?";
$.getJSON(url , function(data){
$.each(data,function(i){
// 取得できるデータは
// http://dev.twitter.com/doc/get/statuses/user_timeline
// にて確認してください。
$("#recent").append("<li>"+this.text+"</li>"); // とりあえず記事本文のみ出力
});
});
alert("OK");
}
</script>
</head>
<body>
<strong>TwitterのつぶやきをJSONPで取得表示する</strong><br />
表示したいアカウント:<input type="text" id="sname" value="">&nbsp;
表示件数:<input type="text" id="count" value="">※デフォルト20件<br />
<input type="button" value="ツイート表示" onclick="dispTweet()">
<div id="recent"></ul>
</body>
</html>
[/html]
サンプルはこちら

即できました。
アカウントと表示件数を変更できるようにしてみました。
ちょいちょい改造すれば普通に見られる感じになります。
※あくまでも基本だけでスミマセン。

参考資料
無題メモランダム:jQueryでJSONP

2011年5月11日

プログラミング言語ってどのくらいあるのかな・・・

投稿者:isc_blog

ふと考えた・・・
プログラミング言語ってどのくらいあるのかな・・・と

そして調べたら次のサイトを発見!

プログラミング言語リンク集

まとめてくれてありがとう!

日経ソフトウェアで取り上げられていた
Scalaについても載っていたので関心しました!

チュートリアルなども一緒に掲載されているので重宝しそうです。(言語マニアとしては・・・)

2011年5月10日

スマートフォン向けアプリ開発フレームワーク

投稿者:isc_blog

先日、アシアル株式会社主催の「iPhone/Androidアプリ制作セミナー」に出てきました。
そこで習った「PhoneGap」を深めようといろいろ作ったりしています。
※発表は後日・・・(出来るかな・・・出来るといいな)

他にもこのようなフレームワークがないかと調べたところ
やっぱりまとめてくれている方がいらっしゃいました。

某開発者の独り言: スマートフォン向けアプリ開発フレームワーク

参考にさせていただきます!

※社内向け覚え書き的な・・・投稿ですみません。

「参考資料」
PhoneGap Fan:アシアル株式会社さんが運営しているサイトです。

2011年5月9日

RubyでCGI作ってみた

投稿者:isc_blog

PythonでCGI作ってみたのRuby版です。

Python版で「とっても稚拙で申し訳ない」といいつつ
稚拙なものを移植しただけで申し訳ないですが全く同じ挙動のものです。

下記を「HelloRuby.cgi」というファイル名で保存し
ウェブサーバー上にアップロード。
属性変更して実行権を与えてから・・・
※パーミッションを755にします。
webブラウザでアクセスします。

[ruby]
#!/usr/local/bin/ruby
#ヘッダ出力
print "Content-type: text/html\n\n"

#CGI 読み込み
require "cgi"
cgi = CGI.new

#リクエスト内容取得
yourName = cgi["yourName"]

#中身出力
print <<EOM
<html>
<head>
<meta http-equiv="Content-type" content="text/html; charset=utf-8">
<script type="text/javascript">
var yourName = "#{yourName}";
function init() {
if (yourName != "") {
alert("YOUR NAME IS " + yourName);
}
}
</script>
</head>
<body onload="init()">
<form action="HelloRuby.cgi">
<input type="text" name="yourName" value="" />
<p>
<input type="submit" />
<p>
</form>
</body>
</html>
EOM
[/ruby]

コードはこれだけ
実行結果はこんな感じ
HelloRuby.cgi実行結果
コード的には
1.「yourName」っていうパラメータがリクエストに存在したら
2.Javascriptでアラート表示
3.送信フォーム表示
・・・・これだけです。
※この説明も「PythonでCGI作ってみた」とおんなじですみません。


Pythonもそうなんだけどリクエストの取扱い方がPerlより簡単でいいなぁ!

「参考になったサイト」
Rubyはじめました:RubyでCGI.フォームデータを受けとる
cgi – Rubyリファレンスマニュアル

2011年5月8日